Express is written in JavaScript and JS supports multiple templating engines like Mustache, Handlebars, doT, EJS, Nunjucks, Underscore, Pug, ECT, Template7, jTemplates and some others. However, in this tutorial, we will be using Pug templating engine for making frontend of Express JS. We can use HTML and CSS directly to make web pages but it becomes difficult to manage these pages for complex applications. For example, a menu is common is mostly all the pages of a web. But when we will create pages directly in HTML and CSS, we will have to update menu code in each webpage. To avoid such issues, Pug engine will help us. It supports template inheritance, conditions and many other attributes making Pug easy to maintain. It supports interpolation, filters and including other pages. To install Pug templating engine, execute the following command:
$ npm install --save pugRemember to use –save in command to update package.json.
After successful installation of Pug engine, create a directory named views. Nowuse app.set() method as shown below in index.js to set Pug templating engine.
//imports express module
let express = require('express');
//initializes express app
let app = express();

//sets template engine
app.set('view engine', 'pug');
//sets directory name
app.set('views','./views');

//listens to server at port 3000
app.listen(3000);
Look at the code above, first we set pug engine, then we set directory path for saving our templates. All the template files have extension .pug. There are two types of views:
- Static Views
- Dynamic Views
Table of Contents
Static Views in Pug:
Static views have static content to render. It does not get any value from server. It has hard coded content and no content can be edited or updated from admin panel of web application.
Now we will create a file Hello.pug in views directory and add the following code.
doctype html
html
    head
        title Hello World
    body
        h1.heading#message Hello, This is pug.
Look at the above code, it looks similar to HTML, however, there is no need of < >. We have starting tags but there is no need to mention ending tags. Now after h1, we have .heading which is class attribute and #message which is id attribute of HTML tag. The above code is similar to the HTML code below.
<!DOCTYPE html>
<html>
    <head>
        <title>
            Hello World
        </title>
    </head>
    <body>
        <h1 class="heading" id="message">Hello, this is pug.</h1>>
    </body>
</html>
Now add route for newly create pug template in index.js as given below.
//imports express module
let express = require('express');
//initializes express app
let app = express();

//sets template engine
app.set('view engine', 'pug');
//sets directory name
app.set('views','./views');

app.get('/', function(request, response){

    response.render('hello');
});
//listens to server at port 3000
app.listen(3000);
Comments in Pug Engine:
We know that to comment any code in HTML, we use the following tags.
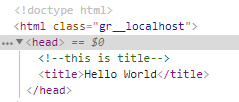
<!-- This is an HTML comment- ->But in Pug engine, there is no need to comment by using these tags. In JavaScript, we use // for commenting code, we will use the same method in Pug template to comment, it will be automatically converted into conventional HTML code as shown below.
doctype html
html
    head
        //this is title
        title Hello World
    body
        h1.heading#message Hello, This is pug.
Indentation in Pug:
It is necessary to indent the code in Pug template according to hierarchy. Otherwise, you may see error in some cases. For example, if we place html and head tag at same level as shown in code below, we will get error.
doctype html
html
head
        //this is title
        title Hello World
    body
        h1.heading#message Hello, This is pug.
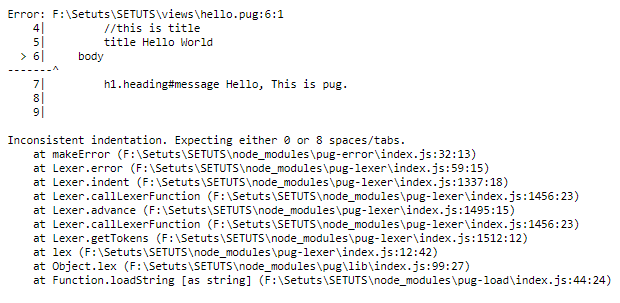
We know that head and body tags are children of html, so head and body will be inside html.
Attributes in Pug:
We have done an example before where we learnt about how to assign id and class to h1 tag. However, there are many other HTML tags with multiple attributes beside id and class. We use these attributes by separating them with comma (,) . See the code below for example:
doctype html
html
    head
        //this is title
        title Hello World
    body
        //alternative HTML code
        //<input type="submit" class="btn btn-primary" id="btn" value="submit">
        //Pug code
        input.btn.btn-primary#btn(type="submit" , value="submit")
Methods of adding text in a tag:
Pug supports three different methods to add text inside a tag.
- Single line spaced text.
- Multiline piped text.
- Block text.
Single Line Text:
This is used when we have to mention text in single line as shown for h1.
doctype html
html
    head
        //this is title
        title Hello World
    body
        h1.heading#message Hello, This is pug.
Piped Text:
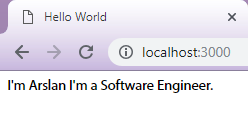
This is used when we have to mention multiple lines of text in a tag using pipe operator as shown below.
doctype html
html
    head
        //this is title
        title Hello World
    body
        div
           | I'm Arslan
           | I'm a Software Engineer.

Piped Text in Pug Engine
Block Text:
When we have a block of text, we use . in the end of our tag name which indicates that it is block of text.
doctype html
html
    head
        //this is title
        title Hello World
    body
        div.
           I'm Arslan.
           I'm a Software Engineer.
           I'm graduated from Lancaster University, UK.
But remember to start each line of text under . sign of div.
Dynamic Views in Pug:
These are the views which are connected to backend of application. In dynamic views, values of various tags get updated according to the response sent by the server. Route handler sends parametric responses to the view. These parameters can be rendered in Pug template. To understand it, let’s create a route handler as shown below.
//imports express module
let express = require('express');
//initializes express app
let app = express();
//sets template engine
app.set('view engine', 'pug');
//sets directory name
app.set('views','./views');

app.get('/', function(request, response){
    //render hello Pug template with firstname and lastname as parameter.
    response.render('hello',{
        firstname: "Arslan ud Din",
        lastname:"Shafiq",
    });
});
//listens to server at port 3000
app.listen(3000);
Now add the following code in hello.pug.
doctype html
html
    head
        //this is title
        title Welcome!
    body
        //firstname and lastname are variables whose values are sent by server
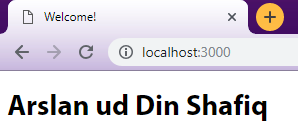
        h1=firstname + " " + lastname
Now when you will access http://localhost:3000, you will see the following output.
Now try to change code in such a way that use text and variables in one line as shown below.
doctype html
html
    head
        //this is title
        title Welcome!
    body
        //firstname and lastname are variables whose values are sent by server
        h1 Hello =firstname + " " + lastname
You will get the following output which is a bug.

Interpolation in Pug:
To avoid this issue, we will use #{firsname} and #{lastname} to render values of variables in text. This is called interpolation.
doctype html
html
    head
        //this is title
        title Welcome!
    body
        //firstname and lastname are variables whose values are sent by server
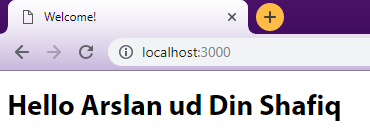
        h1 Hello #{firstname} + " " + #{lastname}
The output will be as shown below:
Conditionals in Pug:
In Pug engine, we can use loops and conditional statements. Loops are helpful when server returns array and conditional statements are helpful in making decision. For example, when a user is logged in, he should be redirected to dashboard, otherwise, he should be redirected sign up. In real application, we handle sessions and cookies in conditional statements. However, we will discuss these concepts later. For this section, we will just check if user variable is set as shown below.
doctype html
html
    head
        //this is title
        title Welcome!
    body
        //checks if user variable is set
        if (user)
            //prints name of user
            h2 Hello Mr. #{user.firstname} #{user.lastname}
        else
            //if user is not set, prints aplogize
            h3 Aplogize, you are not logged in!
Update index.js as shown below.
let express = require('express');
//initializes express app
let app = express();
//sets template engine
app.set('view engine', 'pug');
//sets directory name
app.set('views','./views');
app.get('/', function(request, response){
    //render hello Pug template with user object
    response.render('hello',{
        user: {firstname: "Arslan ud Din", lastname: "Shafiq"}
    });
});
//listens to server at port 3000
app.listen(3000);

Components in Pug:
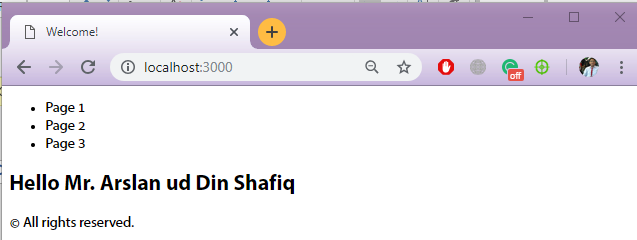
A template can be divided into components. A website mostly has a common menu and footer. In Pug, there is no need of writing same lines of code for menu and footer in every page. You can simply divide your template into components and include these components in your main page. The components can be Pug, CSS or JavaScript file. For example, let’s create two more pug files menu.pug, footer.pug and add the following code in them respectively.
//menu.pug
aside
ul
li Page 1
li Page 2
li Page 3
//footer.pug
div.footer © All rights reserved.
Now update hello.pug according to the code below.
doctype html
html
    head
        //this is title
        title Welcome!
    body
        include ./menu.pug
        //checks if user variable is set
        if (user)
            //prints name of user
            h2 Hello Mr. #{user.firstname} #{user.lastname}
        else
            //if user is not set, prints aplogize
            h3 Aplogize, you are not logged in!
        include ./footer.pug
Now access http://localhost:3000, you will see the following output.
