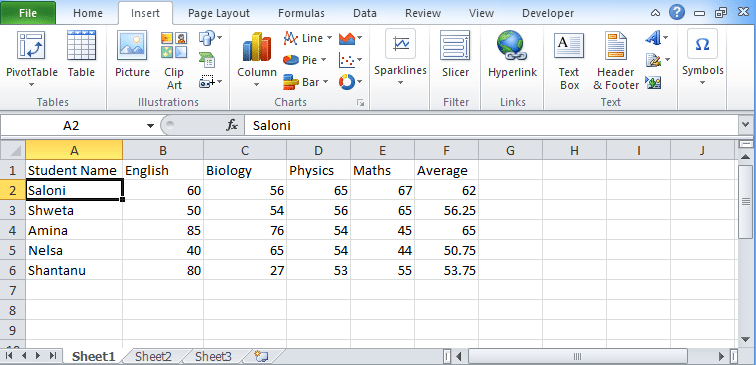
The table converts your data list into Excel tables that consist of many features by which you can sort or filter data set according to your preference. You can organize your data efficiently as well as view your data whenever you want to see. This is an excellent source to create excel pivot table. Use all its features to build a pivot table.
Table of Contents
Excel Tables
Before creating an Excel table, you have to make sure few things like:
- Your data must be an organized one and properly organized in rows and columns. Each row must contain information.
- In a table, every column’s first row consists of a unique heading.
- The table must not have any blank rows or no blank columns.
How to Create Excel Table?
The process to create an excel table is very easy. You have to follow the step-by-step process which we have mentioned below.
- Take a dataset of students.
- Choose a cell from the data list.
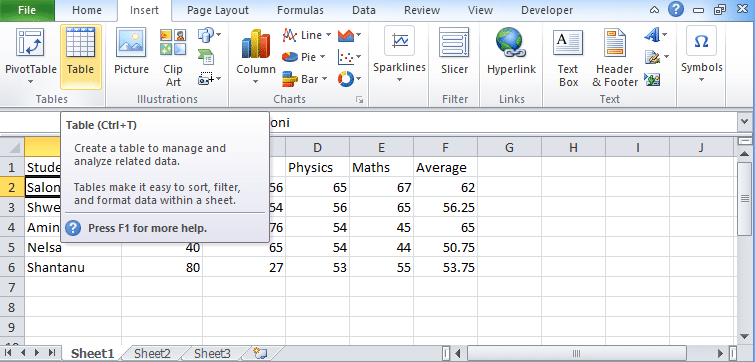
- At the toolbar or ribbon, you will find an insert tab.
- Look for the table icon, click on it.
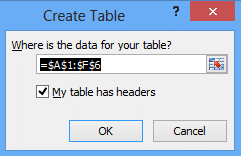
- After clicking on the icon, you will find the Create Table dialog box.
- In this dialog box, you will find the range of data appeared automatically.
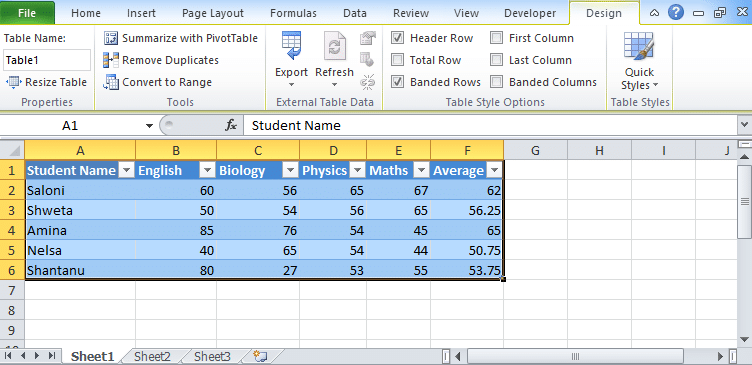
- In the toolbar, you will find the table name box where you can change the name of the table.
Different Styles/Types of Excel table
If you want to apply any table style then follow the below-mentioned steps:
- In the ribbon side, you will find options to create excel table as “Format Table”.
- By clicking on its drop-down icon you will find various templates and formats of the table.
- Select any of the table format or the style that you want.
- Apply the style by right-clicking on the style and press apply and clear formatting.
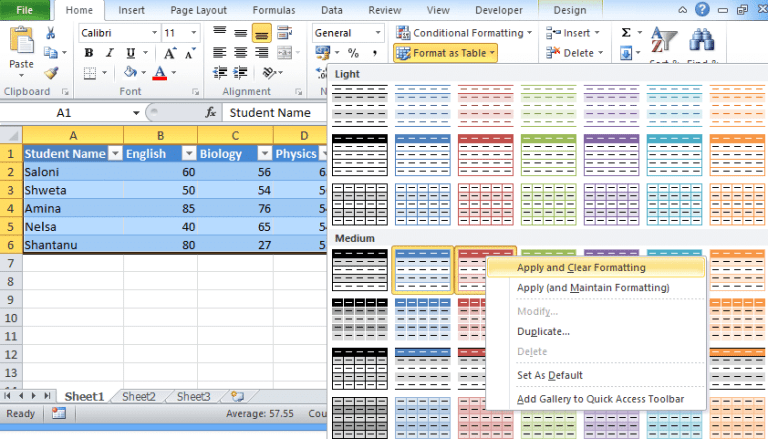
- You will find the new stylist table format.
How to convert an Excel table to the range of data
After you have created your Excel table, you cannot convert your table into the range of your data in Excel online. But you can summarize your table into the pivot table. But how? Check the step by step process here.
- First, create your excel table.
- Select all the cells of your excel table.
- In table tools, go to the Summarize Pivot table.
- Click on the link and you will find a dialog box for creating a pivot table.
- Click OK and you will find an Excel pivot table in front of you.
How to remove duplicates from the Excel Table?
Apart from the pivot table, you can also remove duplicates from the Excel table by following this below-mentioned process.
- Create an Excel table.
- Select the table.
- Go to the Table tools.
- In table tools, you will find remove duplicates icon.
- Click on the icon and you will find that all the duplicates have removed.
This is how you can create excel tables. You can also create a pivot table using excel tables. You can also remove duplicates from the table. Stay connected to get the latest information about Excel.

