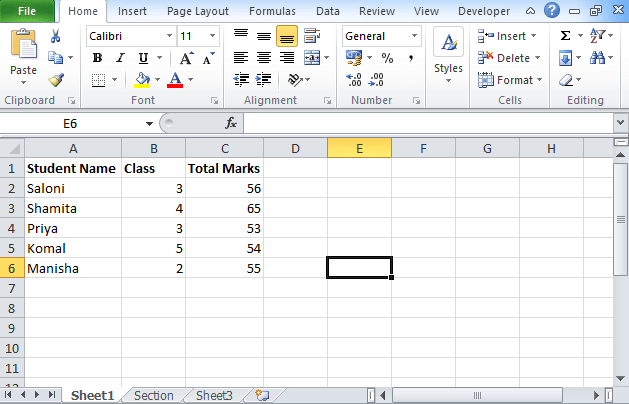
If you are protecting a worksheet, then that means you are locking all the cells. You cannot perform any editing on those cells. To perform the editing of the cells, you need to unlock those cells. Now you must be in a hurry to know how to lock cells in Excel so they don’t move when you scroll. Here we have provided step by step process that will help you in locking cells in excel.
Table of Contents
How to lock cells in excel?
To protect your workbook or worksheet, you can use protect sheet option or lock option by which the user can not make any changes in the worksheet. Here we have given the step-by-step process to lock and unlock the cells.
How to lock all the cells in a worksheet?
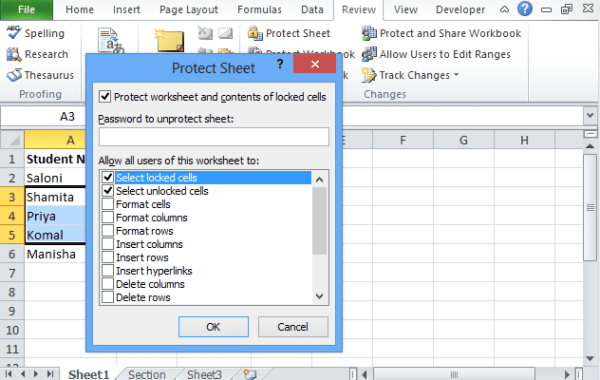
- Look for the review tab located at the ribbon.
- In the review tab, you will find the protect sheet option.
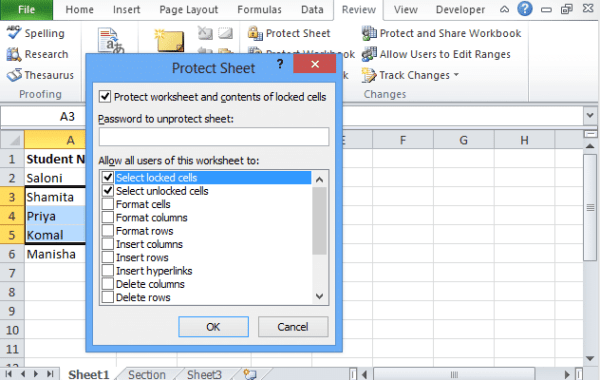
- Click on the protect sheet icon and then ok.
- If you want to make any changes then it will show an error.
- Now choose all the cells on which you don’t want to apply a locking feature.
How to lock particular cells in a worksheet?
- You can also lock the cells via selecting format cells.
- Then click on the protection tab.
- Uncheck the check locked.
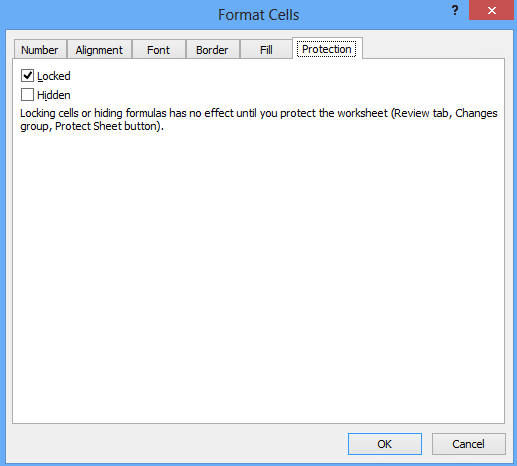
- Click on OK button.
How to Lock Columns in Excel?
To lock columns in excel, you need to do the following things:
Make the column’s selection
- For protecting the single column, click on the column’s letter and select it.
- To protect adjacent columns, right-click on the first column’s heading and drag the selection rightwards or leftwards. To do so, you have to select the column, hold the shift key and then select the last column.
- For non-adjacent columns, click on the column letter hold the Ctrl key and click on the column’s heading that you want to protect.
Lock the selected cell
After selecting the column, follow the above process. Press Ctrl+1 which open Format cells dialogue box. Go to the Protection tab and check the locked option.
Protect the worksheet
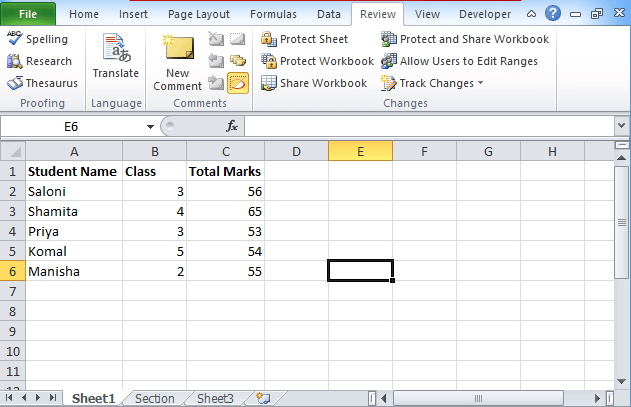
Go to the review option. In the Changes section, you will find the Protect Sheet option. Click on this option to protect your worksheet.
How to lock cells in excel 2007, 2010, 2013, 2016?
If you want to lock a single cell then you need to
- Choose the cell first on which you want to apply the lock feature.
- Go to the formula bar.
- Select the formula to highlight the lock applied on the whole formula or just part of the formula.
- Press F4.
This is how to lock cells in excel formula works. You can also unlock them via unlocking the locked option.
Unlock ranges for users to make editing on a protected worksheet
To allow users to edit ranges even in the protected worksheet, you must have Microsoft Windows on your computer. You can also allow password on the ranges.
- Select the worksheet on which you want to apply for protection.
- In the review tab, you will find Allow users to edit ranges as an option.
- This command is enabled only when your worksheet is protected.
Password Protect in Excel
Why we lock cells in our worksheet or why we protect our worksheet with the password. The answer is to protect your worksheet from other users so that he or she cannot make any changes, deletion, moving of data in a worksheet.
But in some conditions, like if you have team member and any member, and he or she wants to add data in the specific cell and want to keep it secret so that no one can make a modification. But if you want to make certain parts to be editable by others then you can protect specific part of the cells via the password-protected excel. How this password protect excel 2016 feature helps.
This is not a security measure but it prevents users from making any modification. You need to protect your workbook from the user so that the other user cannot make a modification, addition, copying, and hiding the sheets.
Unlock Excel File Password Protected
To let the other user make changes in your password-protected Excel file, you need to type the password and then click ok.
Retype the password to make it confirm. While choosing a password you need to make sure that it is easy for you to remember.
How to Unlock Cells in Excel?
- To unlock cells in Excel, you need to select the cells on which you want to apply the unlocking feature.
- Then go to the format cells option placed on the ribbon.
- Click on the drop-down list and choose the protection tab.
- Click on it and a pop up will show.
- In that pop-up, uncheck the checked Locked option.
Different worksheet functions
- Locked cells: The users are allowed to choose locked checkbox via going to the protection tab from the format cells.
- Unlocked cells: To unlock cells, clear the Locked checkbox.
- Format cells: To format cells, you must select a cell formatting option or conditional formatting option. If you are using conditional formatting excel before protecting the worksheet then formatting will changes.
- Format columns: You can change the column width or hide columns using the home tab, cells group, and format button.
- Format rows: Change row height via row formatting commands. For this go to the home tab, cells group, and then the format button.
At our website, you can also check how to enter data into excel, an opening of excel and how to use various formulas in excel.

